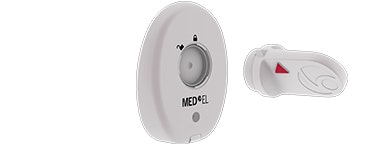
RONDO 2
CI Audio Processor
These support guides will help you handle and care for the RONDO 2 Audio Processor.
Changing the Magnet

Place the magnet exchange tool over the magnet, with the arrow on the tool pointing to the locked symbol.

Turn the tool to point to the unlocked symbol. Lift the magnet out of RONDO 2.

Pick up the new magnet with the tool, making sure the arrow on the tool is over the bar on the magnet.
Place the magnet into the processor, with the arrow pointing to the unlocked symbol.

Turn the tool to point to the locked symbol.
MED-EL strongly recommends that you do not change the magnet yourself. Contact your clinician to have the magnet changed or if you experience any skin irritation.
Refer to your user manual for more information.

